New Model DropBox creation
Step by Step…
The following is a written step by step instructions based on the video content above: Each # step has the video time mark under if for simple reference.
Please Note, Please always keep in mind, the content in each of the models DropBox folders should match that of the models MediaSlide folder content.
Step 1:
video mark 0:00-0:16
Go to the UU DropBox account “MODELS” folder. If you do not have access please ask accounting accounts@unite-unite.com or text 571-216-5502.

Step 2:
video mark 0:17-0:18
Select either “Men” or “Women”, here we are selecting “Women”

Step 3:
video mark 0:19-0:22
Select “New Folder” option from the right side menu.

Step 4:
video mark 0:23-0:30
Type in the models name and click “create”

Step 5:
video mark 0:21-0:36
Go back to the Women folder and find the folder named “New Model Folder Template” and open it.

Step 6:
video mark 0:30-0:42
Once in the folder click the select all check box.

Step 8:
video mark 0:42-0:44
From the right menu select “copy”

Step 9:
video mark 0:44-0:57
A popup window will ask you to select where to copy the folders to. Select the New Folder you created for your model, it should be the suggested folder at the top of the window, if not navigate back to the “Women” and find the folder you created earlier and click on the “copy” button in the lower left corner.

Thats it! You just created your first Model folder.
If you need to now load Book or Digital images to the models DB folders please follow the instructions below.
How to add images correctly to the DB folders.
It’s very important that everyone follows the same procedure when updating a models image and digital folders. This ensures that the team is able to access the appropriate images for a specific client package or building a custom book.
Step 1:
video mark 0:57-1:13
The #1 procedure to follow is:
ALL IMAGES MUST FIRST BE LOADED TO THE MODELS ARCHIVES FOLDER.
Go to the models folder and select the “BOOK” folder.

Step #2:
video mark 1:13-1:14
Select the “ARCHIVE” folder.

Step #3:
video mark 1:14-1:27
Select the images from your desktop and drag all of them to the “ARCHIVE” folder.
That’s all there is to it.
If you need to add a models Digitals (or book images) that are on the MediaSlide, continue on to step #4.

Step #4:
video mark 1:27-1:36
Here we will download images from a models MediaSlide image archives and place them into their DropBox (DB) folders.
Start by opening the models DB “DIGITALS” folder and select the “ARCHIVE” folder.

Step #5:
video mark 1:36-1:45
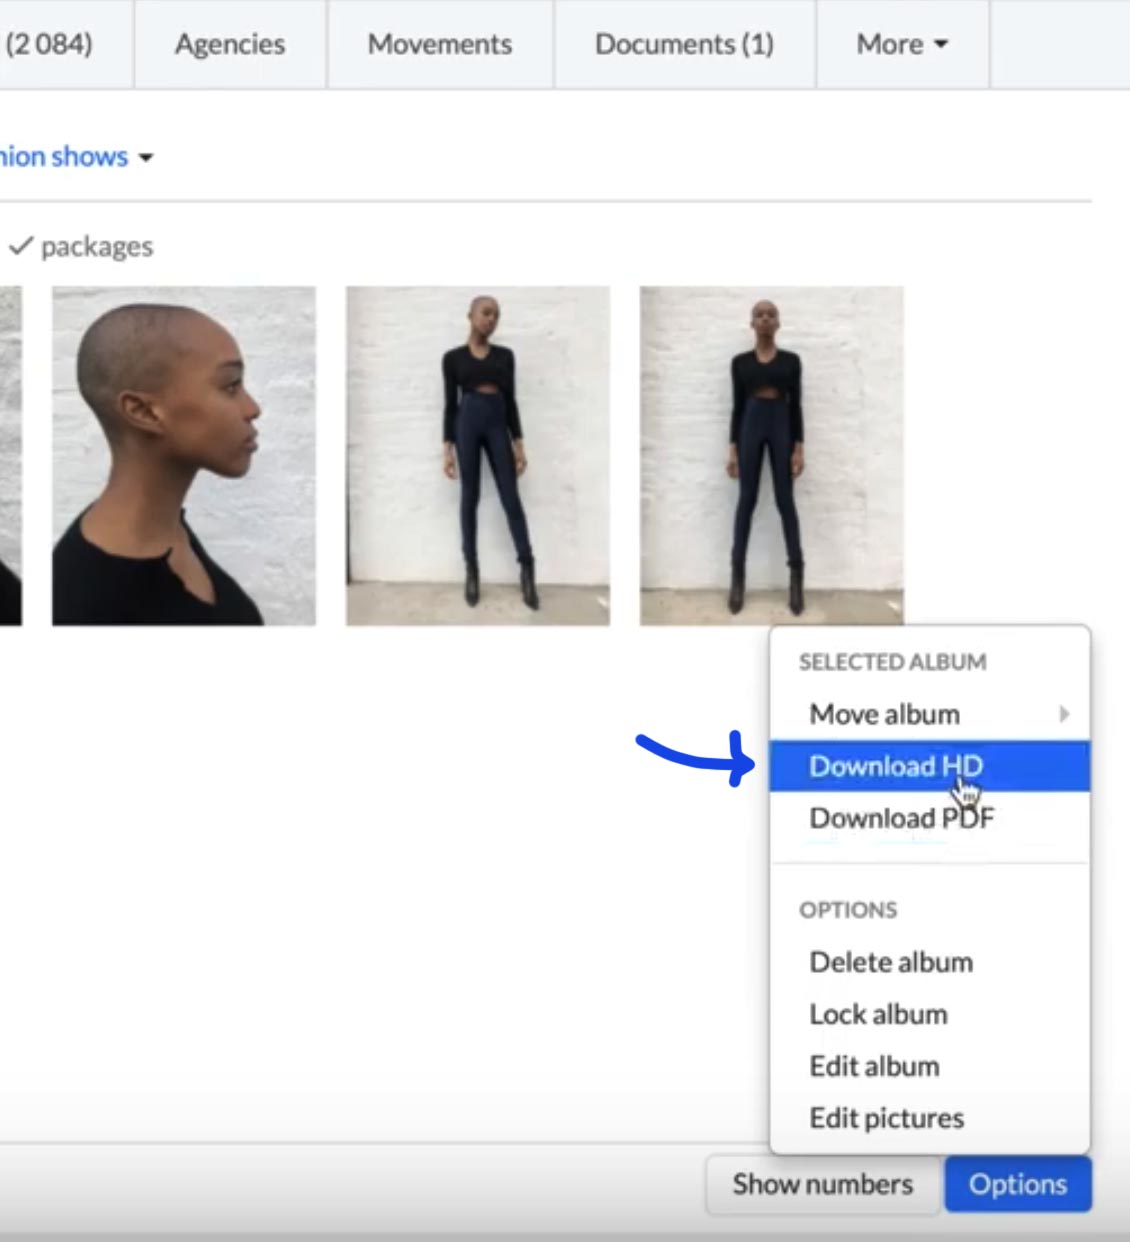
Go to the models MS account and select the image group you wish to add to the DB. Here we are going to add her current “digi’s” collection and then click on the “Options” button in the lower right of the window.

Step #6:
video mark 1:46-1:49
From the “Options” button select “Download HD” and all the images selected will download as a zip folder to your Download Folder.
Step #7:
video mark 1:50-2:11
Select all the images to import and drag them into the Digital Archive folder.
Thats it! If you have an questions please watch the video and if you still need some help just ask a member of the UU Team or email accounts@unite-unite.com or text accounting @ 571-216-5502
